“Solar panel wiring to house breaker box”
Introduction to Solar Panel Systems
A solar panel system consists of multiple components, including solar panels, a mounting system, an inverter, and a breaker box. The solar panels convert sunlight into direct current (DC) electricity, which is then fed into an inverter. The inverter converts the DC power into alternating current (AC) electricity, which is usable in homes and businesses. The AC electricity is then connected to the house breaker box, where it is distributed to various loads, such as lighting, appliances, and HVAC systems.
Components of a Solar Panel System
Before diving into the wiring process, it’s essential to understand the components involved in a solar panel system. These include:
- Solar Panels: These are the photovoltaic (PV) modules that convert sunlight into DC electricity.
- Inverter: This device converts the DC power from the solar panels into AC electricity.
- Mounting System: This includes the racks, clamps, and hardware that secure the solar panels to the roof or ground.
- Charge Controller: This component regulates the flow of energy between the solar panels and the battery bank (if present).
- Battery Bank: This stores excess energy generated by the solar panels for later use.
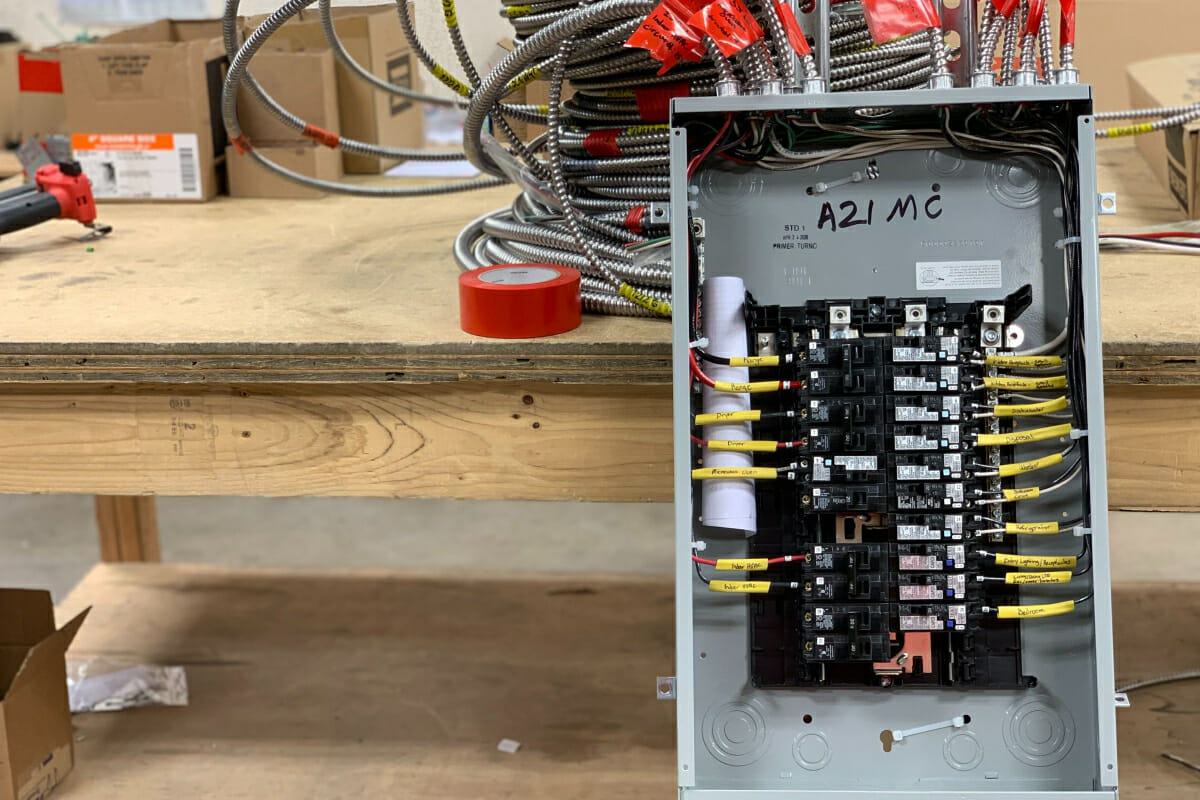
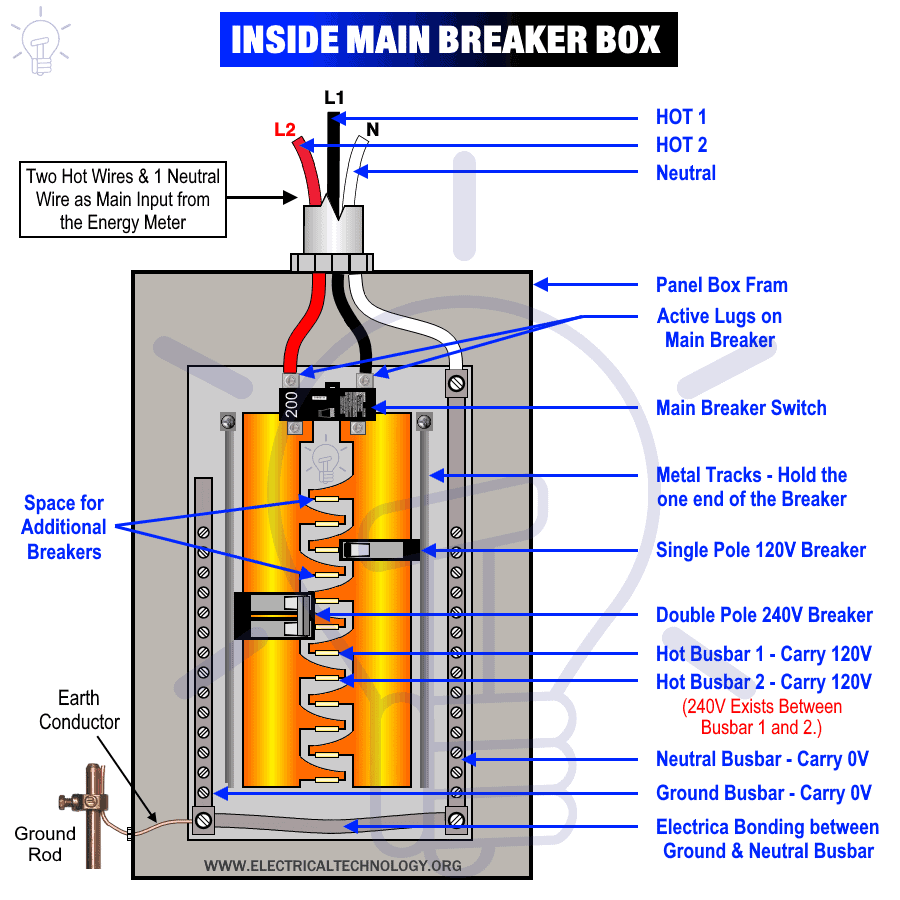
- Breaker Box: This is the main electrical panel that distributes AC power to various loads in the house.
Safety Considerations
When working with electrical systems, safety is paramount. Before starting the wiring process, ensure that:
- You have the necessary training and experience: Solar panel installation requires specialized knowledge and skills. If you’re not familiar with electrical systems, consider hiring a licensed electrician.
- You have the necessary permits and approvals: Check with your local authorities to obtain the necessary permits and approvals before starting the installation.
- You follow the manufacturer’s instructions: Read and follow the manufacturer’s instructions for each component, including the solar panels, inverter, and breaker box.
- You use personal protective equipment: Wear protective gear, such as safety glasses, gloves, and a hard hat, when working with electrical systems.

Step-by-Step Wiring Instructions
Now that we’ve covered the essential components and safety considerations, let’s dive into the step-by-step wiring instructions:
Step 1: Connect the Solar Panels to the Inverter
- Connect the positive (red) wire from the solar panel to the positive terminal on the inverter.
- Connect the negative (black) wire from the solar panel to the negative terminal on the inverter.
- Ensure that the wires are securely connected to the inverter using the recommended connectors and torque specifications.
Step 2: Connect the Inverter to the Breaker Box
- Connect the AC output wires from the inverter to the breaker box.
- Ensure that the wires are sized correctly for the inverter’s output rating and the breaker box’s capacity.
- Connect the neutral wire from the inverter to the neutral bus bar in the breaker box.
- Connect the ground wire from the inverter to the ground bus bar in the breaker box.
Step 3: Install a Dedicated Circuit Breaker
- Install a dedicated circuit breaker in the breaker box for the solar panel system.
- Ensure that the circuit breaker is rated for the inverter’s output rating and is compatible with the breaker box.
- Connect the AC output wires from the inverter to the dedicated circuit breaker.
Step 4: Connect the Solar Panel System to the Grid (Optional)
If you want to connect your solar panel system to the grid, you’ll need to:
- Install a grid-tie inverter that is compatible with your utility company’s requirements.
- Connect the AC output wires from the inverter to the grid-tie inverter.
- Ensure that the grid-tie inverter is configured to meet the utility company’s requirements.
Step 5: Test and Commission the System
- Test the solar panel system to ensure that it’s producing electricity and feeding it into the breaker box.
- Use a multimeter to measure the voltage and current output of the system.
- Commission the system by setting the inverter and breaker box to operate in parallel with the grid (if applicable).
Best Practices and Troubleshooting Tips
To ensure that your solar panel system operates efficiently and safely, follow these best practices and troubleshooting tips:
- Regularly inspect the system: Check the solar panels, inverter, and breaker box for signs of wear and tear, damage, or malfunction.
- Monitor system performance: Use a monitoring system to track the system’s performance, including energy production, voltage, and current.
- Keep the system clean: Regularly clean the solar panels to maintain their efficiency.
- Troubleshoot issues promptly: Address any issues or errors promptly to prevent damage to the system or electrical shock.
Conclusion
Solar panel wiring to the house breaker box requires careful planning, attention to detail, and adherence to safety protocols. By following the step-by-step instructions outlined in this article, you can ensure a safe and efficient connection between your solar panel system and the house breaker box. Remember to always follow the manufacturer’s instructions, use personal protective equipment, and consult with a licensed electrician if you’re unsure about any aspect of the installation. With proper installation and maintenance, your solar panel system can provide clean, renewable energy for years to come.