With the initial investment of purchasing and installing solar panels, homeowners can significantly reduce their reliance on traditional energy sources and enjoy substantial savings on their energy bills. However, the installation process can be daunting, especially when it comes to wiring the solar panels. In this article, we will provide a step-by-step guide on wiring solar panels for off-grid homes, helping you navigate the process with ease.
Understanding the Basics of Solar Panel Wiring
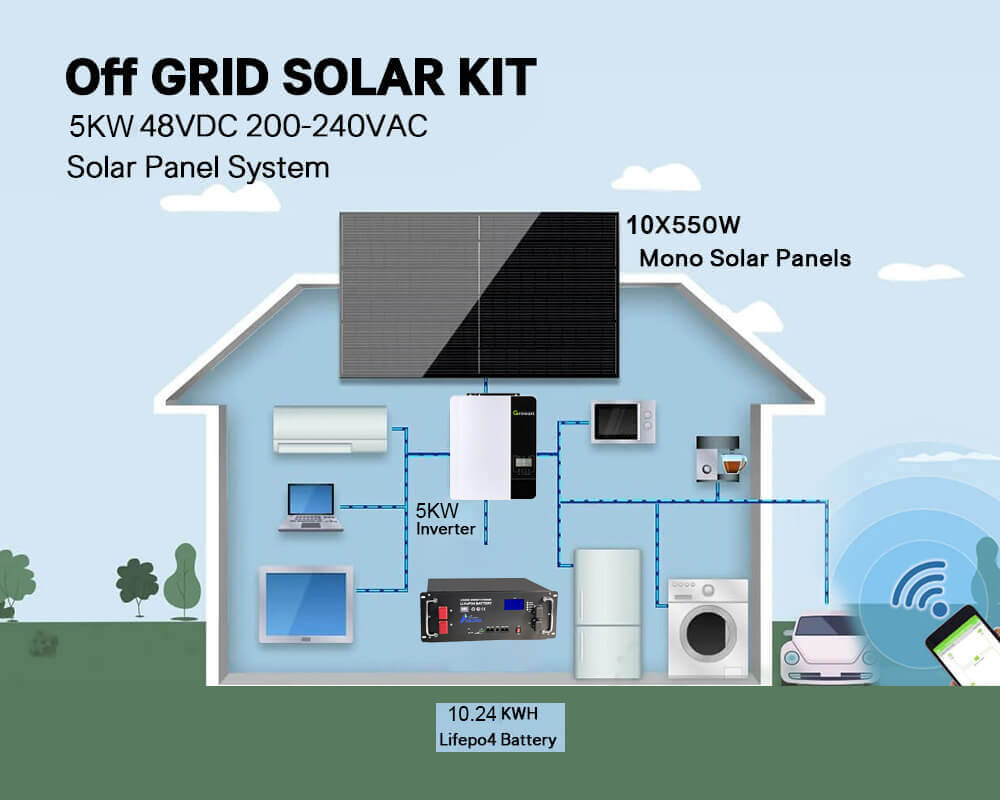
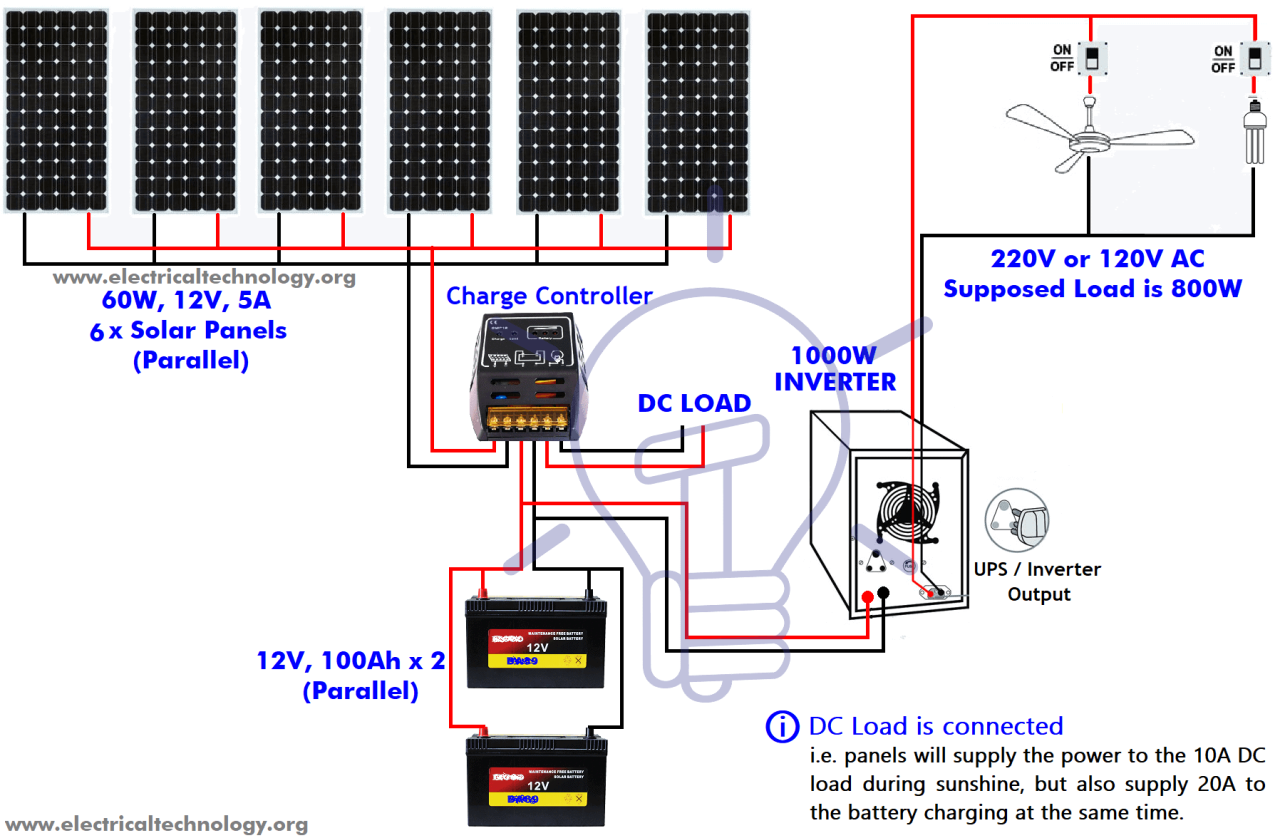
Before we dive into the step-by-step process, it's essential to understand the basics of solar panel wiring. A solar panel system typically consists of multiple components, including:
- Solar Panels: These are the photovoltaic (PV) panels that convert sunlight into electrical energy.
- Charge Controller: This device regulates the flow of energy from the solar panels to the battery bank, preventing overcharging and damage to the system.
- Battery Bank: A deep cycle battery bank stores excess energy generated by the solar panels for use during periods of low sunlight or at night.
- Inverter: The inverter converts DC (direct current) power from the battery bank into AC (alternating current) power, suitable for household appliances.
- Load Center: This is the main electrical panel that distributes power to the various circuits in the home.
Gathering Materials and Tools
Before starting the wiring process, gather the necessary materials and tools:
- Solar panels: Ensure you have the correct number of solar panels for your system, taking into account the wattage and voltage requirements.
- Charge controller: Choose a charge controller that matches the voltage and current requirements of your solar panel array.
- Battery bank: Select a deep cycle battery bank that meets the energy storage needs of your home.
- Inverter: Choose an inverter that matches the voltage and power requirements of your load center.
- Wiring and connectors: Use high-quality, UV-resistant wiring and connectors to ensure a safe and reliable connection.
- Circuit breakers and fuses: Install circuit breakers and fuses to protect the system from overloads and short circuits.
- Grounding equipment: Ensure you have the necessary grounding equipment, including grounding rods and clamps.
Step-by-Step Wiring Process
Now that we have covered the basics and gathered the necessary materials, let's proceed with the step-by-step wiring process:
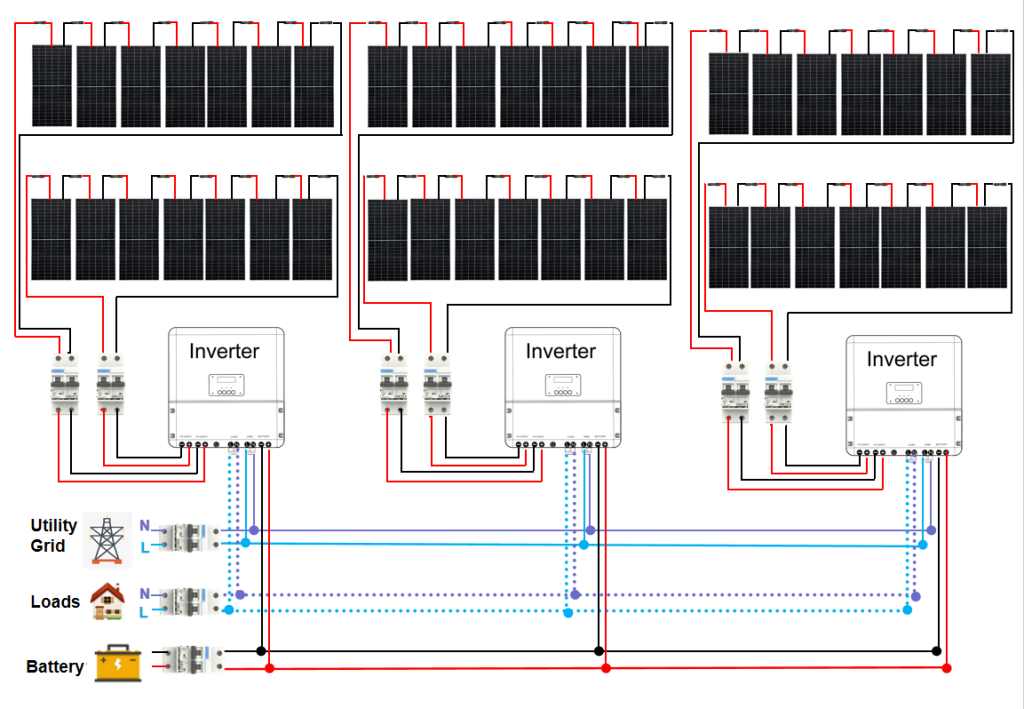
Step 1: Connect the Solar Panels
- Begin by connecting the solar panels in a series-parallel configuration to achieve the desired voltage and current output.
- Use high-quality, UV-resistant wiring to connect the solar panels, ensuring a secure and reliable connection.
- Connect the positive terminal of one solar panel to the negative terminal of the next solar panel, and so on, to create a series connection.
- Repeat the process for the remaining solar panels, connecting them in parallel to increase the overall current output.
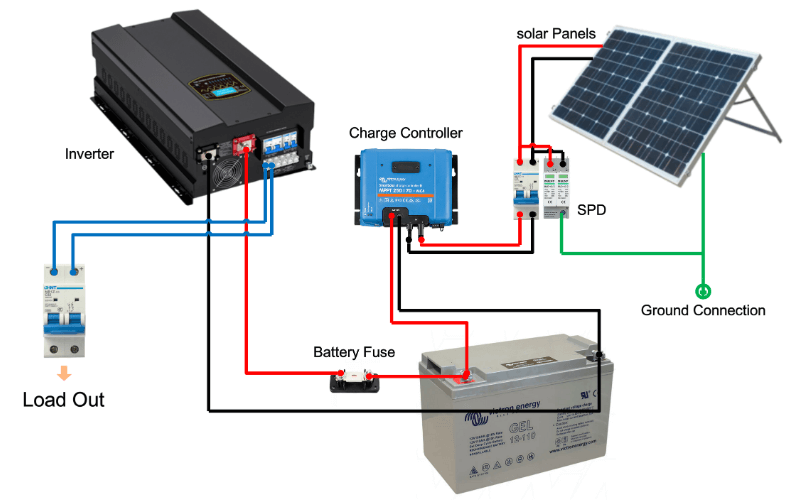
Step 2: Connect the Charge Controller
- Connect the output of the solar panel array to the input of the charge controller.
- Ensure the charge controller is set to the correct voltage and current range for your solar panel array.
- Connect the output of the charge controller to the battery bank, ensuring the correct polarity and voltage matching.
Step 3: Connect the Battery Bank
- Connect the battery bank to the output of the charge controller, ensuring the correct polarity and voltage matching.
- Use high-quality, heavy-duty wiring to connect the battery bank, taking into account the high current demands.
- Connect the positive terminal of one battery to the negative terminal of the next battery, and so on, to create a series connection.
- Repeat the process for the remaining batteries, connecting them in parallel to increase the overall energy storage capacity.
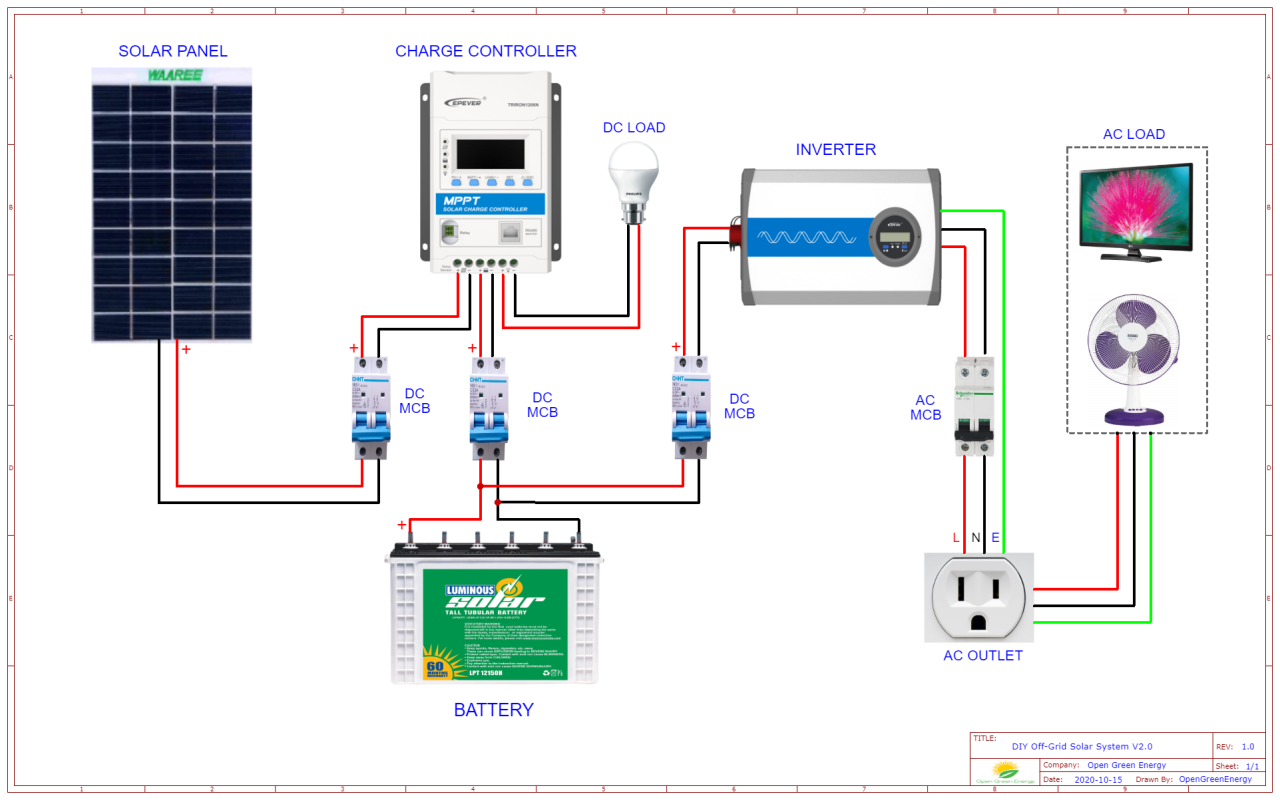
Step 4: Connect the Inverter
- Connect the output of the battery bank to the input of the inverter.
- Ensure the inverter is set to the correct voltage and power output for your load center.
- Connect the output of the inverter to the load center, ensuring the correct voltage and power matching.
Step 5: Connect the Load Center
- Connect the output of the inverter to the load center, ensuring the correct voltage and power matching.
- Distribute power to the various circuits in the home, using circuit breakers and fuses to protect the system from overloads and short circuits.
- Ensure all wiring and connections meet local electrical codes and regulations.
Step 6: Grounding and Bonding
- Connect the grounding rod to the grounding bus in the load center.
- Connect the grounding bus to the solar panel array, charge controller, and battery bank, ensuring a safe and reliable ground connection.
- Bond all metal components, including the solar panel array, charge controller, and battery bank, to the grounding system.
Step 7: Testing and Commissioning
- Test the system to ensure all components are functioning correctly and safely.
- Check the voltage and current output of the solar panel array, charge controller, and inverter.
- Verify the battery bank is charging and discharging correctly.
- Test the load center and circuit breakers to ensure proper distribution of power to the various circuits.
Conclusion
Wiring solar panels for off-grid homes requires careful planning, attention to detail, and a thorough understanding of the electrical system. By following the step-by-step process outlined in this article, you can ensure a safe, reliable, and efficient solar panel system for your off-grid home. Remember to always follow local electrical codes and regulations, and consult a professional if you are unsure about any aspect of the wiring process. With the correct installation and maintenance, your solar panel system will provide you with years of clean, renewable energy and substantial savings on your energy bills.