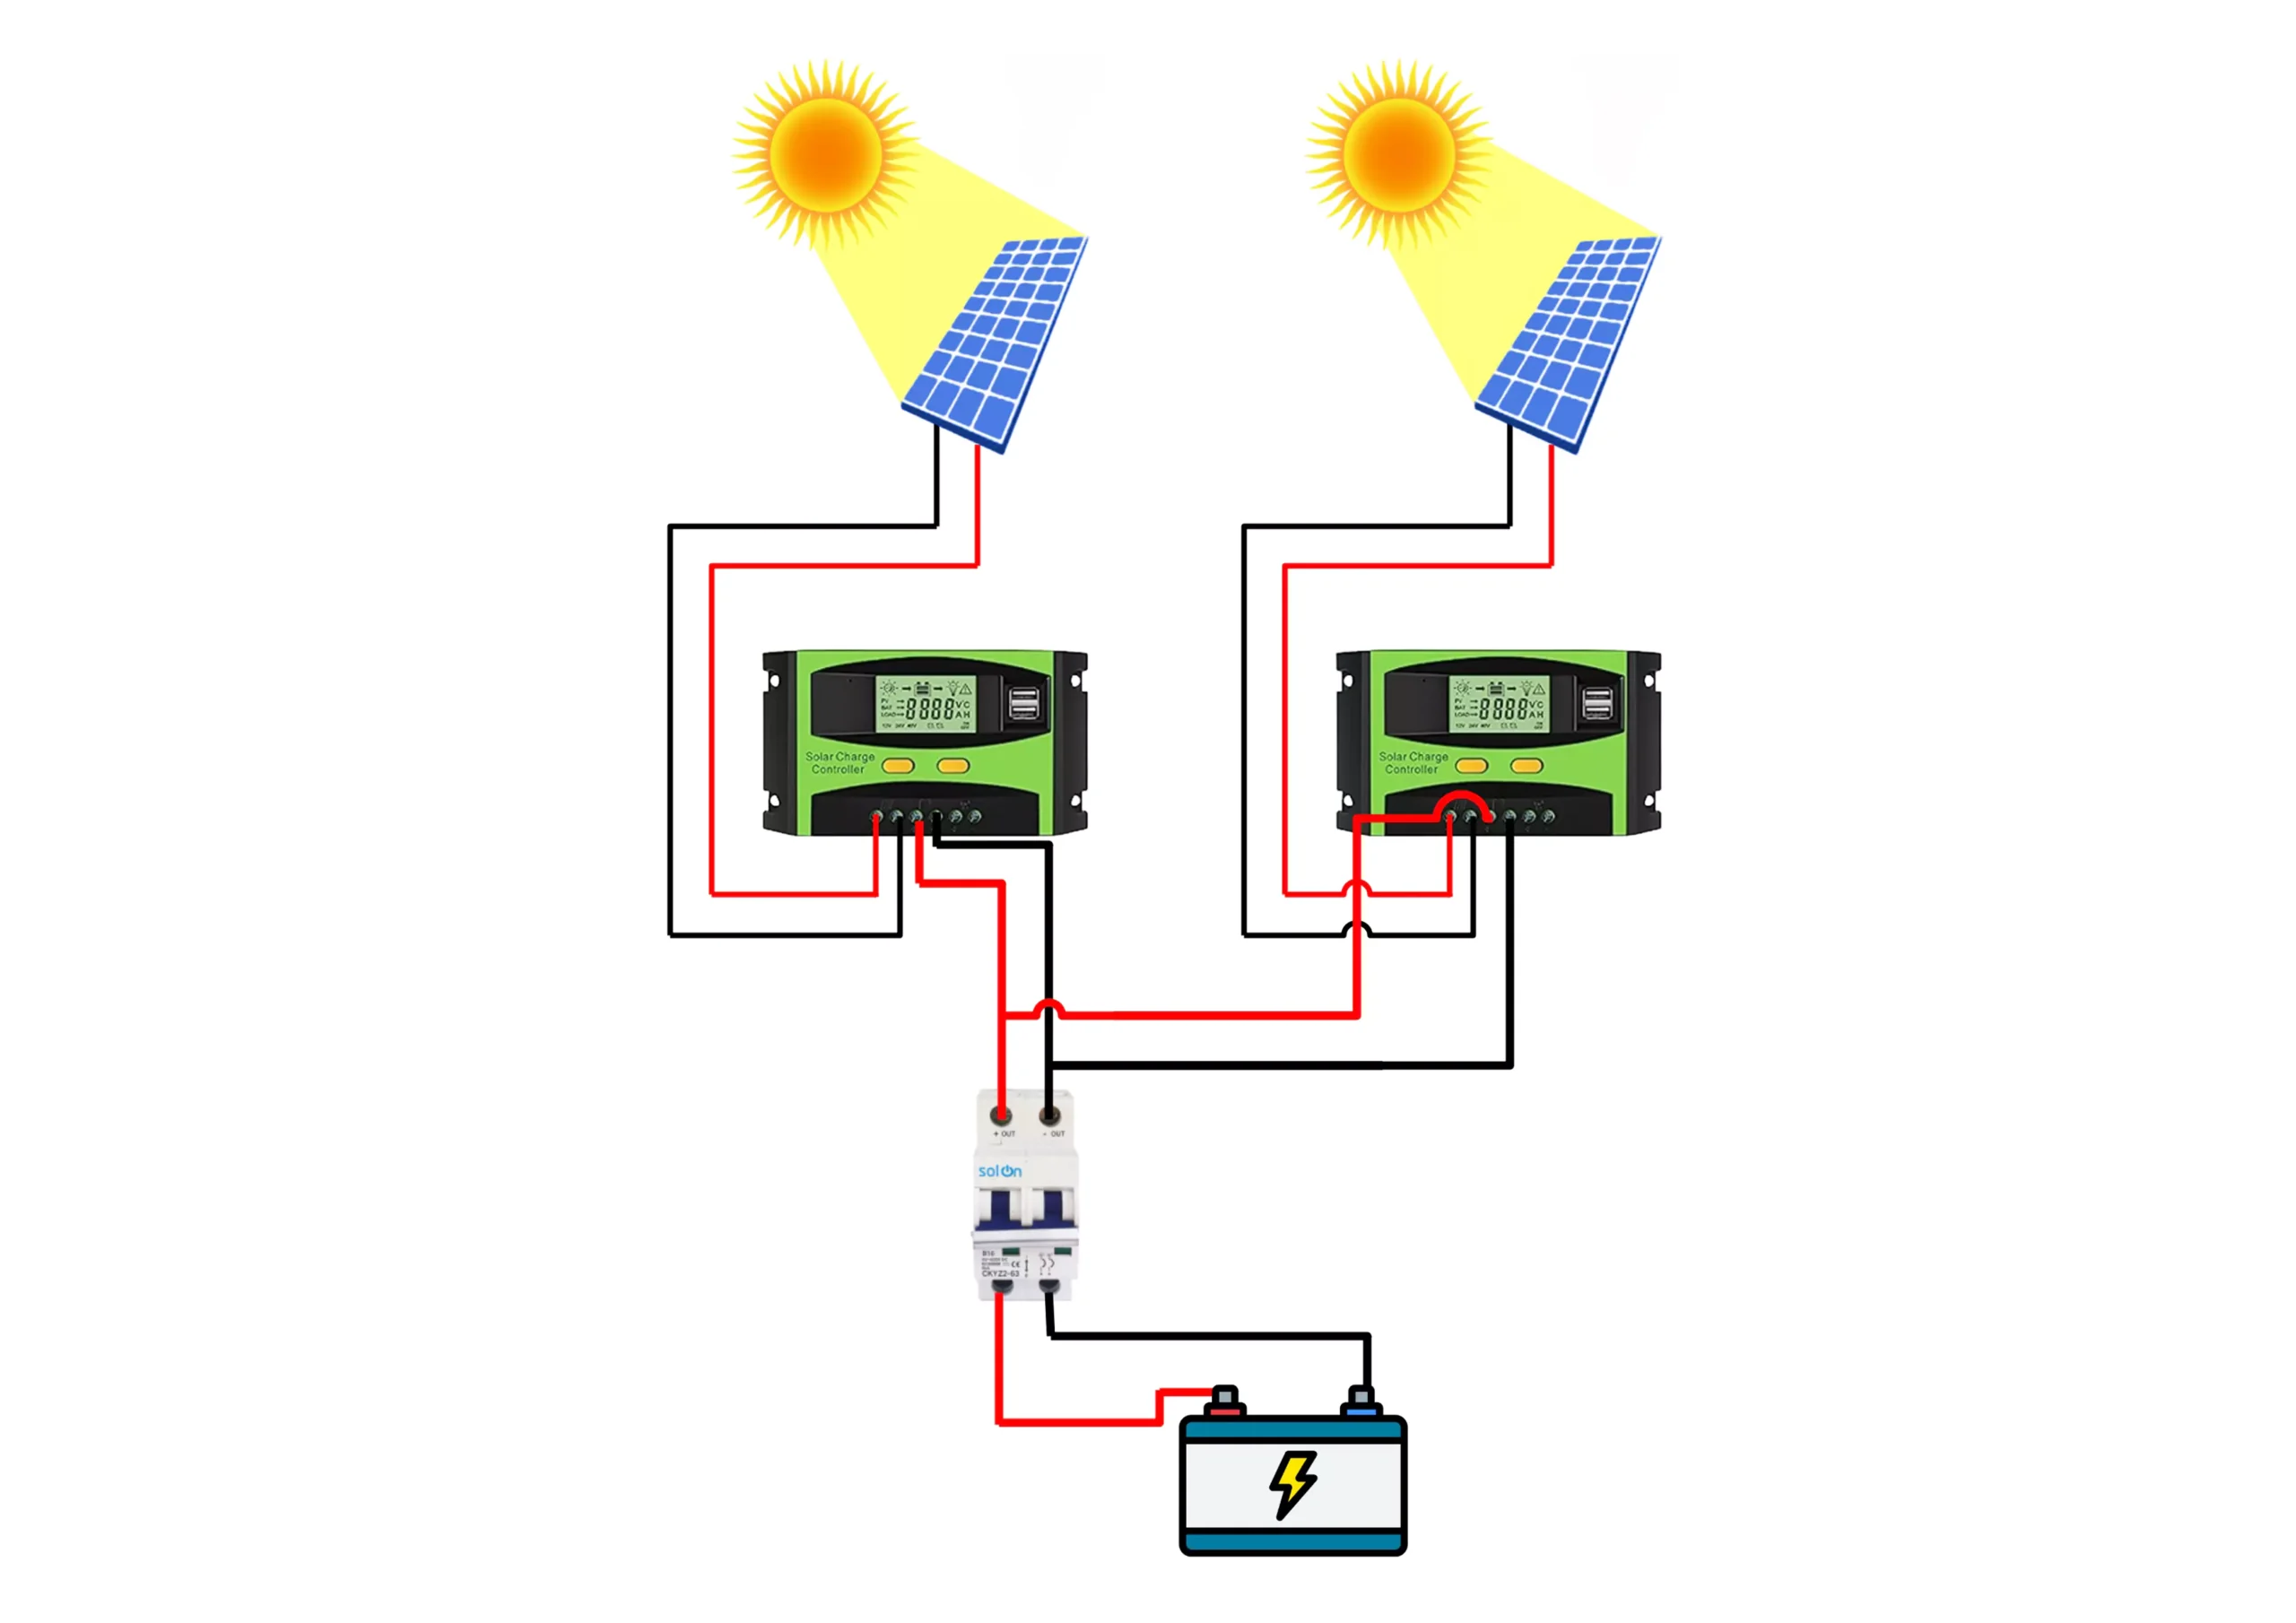
“Solar panel to MPPT charge controller wiring”
Introduction to MPPT Charge Controllers
MPPT charge controllers are designed to regulate the flow of energy from the solar panel array to the battery bank, ensuring that the maximum amount of power is extracted from the solar panels and stored in the batteries. Unlike traditional Pulse Width Modulation (PWM) charge controllers, MPPT controllers use advanced algorithms to track the maximum power point of the solar panel array, adjusting the voltage and current to optimize energy production.
Advantages of MPPT Charge Controllers
MPPT charge controllers offer several advantages over traditional PWM controllers, including:
- Higher Efficiency: MPPT controllers can extract up to 30% more energy from the solar panel array compared to PWM controllers.
- Improved Battery Life: By regulating the flow of energy to the battery bank, MPPT controllers help prevent overcharging and undercharging, which can prolong the lifespan of the batteries.
- Flexibility: MPPT controllers can handle a wide range of solar panel array configurations, including series and parallel connections.
Wiring Considerations
When wiring a solar panel array to an MPPT charge controller, there are several factors to consider to ensure a safe and efficient installation:
- Solar Panel Configuration: The solar panel array should be configured to match the input specifications of the MPPT charge controller. This includes the number of panels in series and parallel, as well as the total voltage and current output.
- Wire Size and Type: The wire size and type used for the solar panel array and MPPT charge controller connections must be sufficient to handle the maximum current output of the solar panel array. A general rule of thumb is to use wire with a minimum of 10 AWG (American Wire Gauge) for solar panel arrays up to 100W, and 8 AWG for arrays between 100W and 200W.
- Connection Types: The connections between the solar panel array, MPPT charge controller, and battery bank should be secure and reliable. Use connectors specifically designed for solar panel applications, such as MC4 connectors, to ensure a safe and efficient connection.
- Fusing and Protection: Fuses or circuit breakers should be installed to protect the solar panel array, MPPT charge controller, and battery bank from overcurrent conditions. The fuse or circuit breaker rating should be matched to the maximum current output of the solar panel array.
- Grounding and Bonding: The solar panel array, MPPT charge controller, and battery bank should be properly grounded and bonded to prevent electrical shock and ensure safe operation.

Step-by-Step Wiring Instructions
Here’s a step-by-step guide to wiring a solar panel array to an MPPT charge controller:

- Connect the Solar Panel Array: Connect the solar panel array to the MPPT charge controller using the recommended wire size and type. Ensure the connections are secure and reliable.
- Connect the MPPT Charge Controller to the Battery Bank: Connect the MPPT charge controller to the battery bank using the recommended wire size and type. Ensure the connections are secure and reliable.
- Configure the MPPT Charge Controller: Configure the MPPT charge controller according to the manufacturer’s instructions, including setting the charging parameters, monitoring settings, and communication protocols.
- Install Fuses or Circuit Breakers: Install fuses or circuit breakers to protect the solar panel array, MPPT charge controller, and battery bank from overcurrent conditions.
- Ground and Bond the System: Ground and bond the solar panel array, MPPT charge controller, and battery bank to prevent electrical shock and ensure safe operation.
Troubleshooting and Maintenance
To ensure optimal performance and prolong the lifespan of the solar panel system, regular maintenance and troubleshooting are essential. Here are some common issues and solutions:
- Low Voltage: Check the solar panel array configuration, wire size, and connections to ensure they are sufficient to handle the maximum current output.
- High Voltage: Check the solar panel array configuration and MPPT charge controller settings to ensure they are matched to the battery bank voltage.
- Overcurrent Conditions: Check the fuse or circuit breaker rating to ensure it is matched to the maximum current output of the solar panel array.
- Communication Issues: Check the communication protocols and settings to ensure they are configured correctly.
Conclusion
In conclusion, solar panel to MPPT charge controller wiring requires careful consideration of several factors, including solar panel configuration, wire size and type, connection types, fusing and protection, and grounding and bonding. By following the step-by-step wiring instructions and troubleshooting guide, you can ensure a safe and efficient installation that optimizes energy production and prolongs the lifespan of the battery bank. Remember to regularly maintain and monitor the system to ensure optimal performance and address any issues that may arise.
Additional Resources
For more information on solar panel to MPPT charge controller wiring, refer to the following resources:
- National Electric Code (NEC): The NEC provides guidelines for electrical wiring, including solar panel systems.
- Manufacturer’s Instructions: Consult the manufacturer’s instructions for the MPPT charge controller, solar panel array, and battery bank for specific wiring and configuration recommendations.
- Online Forums and Communities: Join online forums and communities to connect with other solar panel system installers and enthusiasts, sharing knowledge and best practices.
By following the guidelines and best practices outlined in this article, you can create a safe and efficient solar panel system that meets your energy needs and contributes to a sustainable future.


