“12V solar panel wiring diagram for camper vans”
Introduction to Solar Panel Systems
A solar panel system consists of several components, including solar panels, a charge controller, a battery bank, and an inverter. The solar panels convert sunlight into DC (direct current) electricity, which is then regulated by the charge controller and stored in the battery bank. The inverter converts the DC power into AC (alternating current) electricity, making it usable for appliances and devices.
Understanding 12V Solar Panel Wiring Diagrams
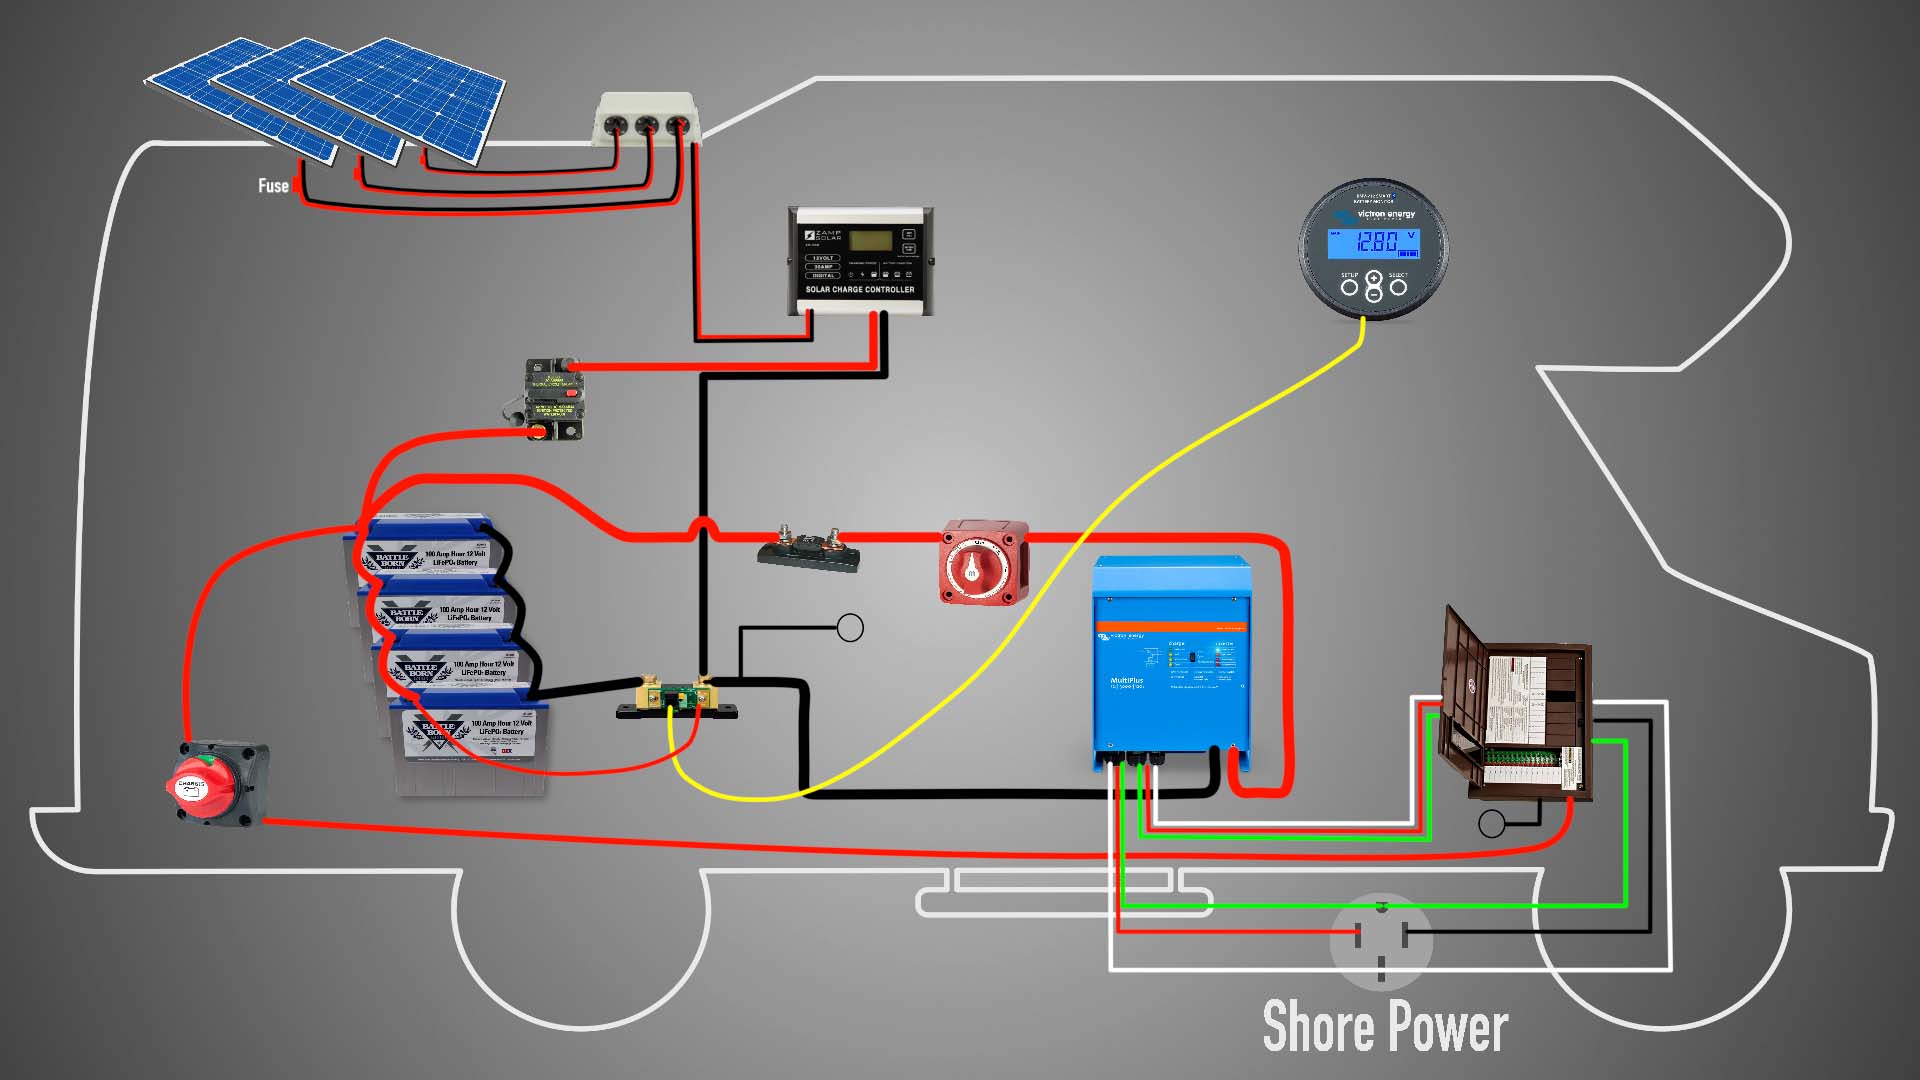
A 12V solar panel wiring diagram is a visual representation of the electrical connections between the solar panels, charge controller, battery bank, and other components. The diagram illustrates the flow of electricity, ensuring that the system is properly configured and safe to operate.
When designing a 12V solar panel wiring diagram for a camper van, several factors must be considered:
- Solar Panel Array: The solar panel array is the heart of the system, consisting of one or more solar panels connected in series and/or parallel.
- Charge Controller: The charge controller regulates the flow of energy from the solar panels to the battery bank, preventing overcharging and damage.
- Battery Bank: The battery bank stores excess energy generated by the solar panels, providing power when the sun is not shining.
- Inverter: The inverter converts the DC power from the battery bank into AC power, making it usable for appliances and devices.
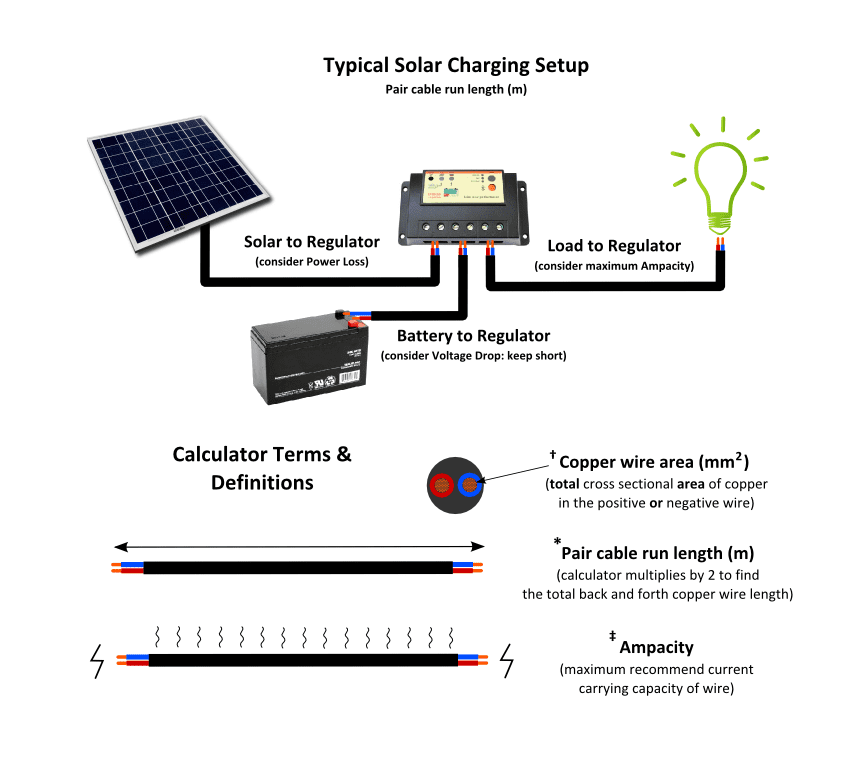
- Wiring and Connectors: The wiring and connectors used to connect the components must be suitable for the application, taking into account factors such as voltage, current, and environmental conditions.
Components of a 12V Solar Panel Wiring Diagram
A typical 12V solar panel wiring diagram for a camper van includes the following components:
- Solar Panels: Represented by a symbol, the solar panels are connected in series and/or parallel to form the solar panel array.
- Charge Controller: The charge controller is represented by a symbol, connected between the solar panel array and the battery bank.
- Battery Bank: The battery bank is represented by a symbol, consisting of one or more batteries connected in series and/or parallel.
- Inverter: The inverter is represented by a symbol, connected between the battery bank and the load (appliances and devices).
- Fuses and Circuit Breakers: Fuses and circuit breakers are used to protect the system from overcurrent and short circuits.
- Wiring and Connectors: The wiring and connectors used to connect the components are represented by lines and symbols, indicating the type and size of the wiring and connectors.
Designing a 12V Solar Panel Wiring Diagram
To design a 12V solar panel wiring diagram for a camper van, follow these steps:
- Determine the Power Requirements: Calculate the power requirements of the camper van, including the energy needed to charge the battery bank and power appliances and devices.
- Select the Solar Panel Array: Choose a solar panel array that meets the power requirements, taking into account factors such as sunlight hours, temperature, and shading.
- Select the Charge Controller: Choose a charge controller that is compatible with the solar panel array and battery bank, ensuring proper regulation of energy flow.
- Select the Battery Bank: Choose a battery bank that meets the energy storage requirements, taking into account factors such as depth of discharge, cycle life, and maintenance.
- Select the Inverter: Choose an inverter that is compatible with the battery bank and load, ensuring proper conversion of DC power to AC power.
- Design the Wiring and Connectors: Choose the wiring and connectors that meet the application requirements, taking into account factors such as voltage, current, and environmental conditions.
- Create the Wiring Diagram: Create the wiring diagram, ensuring that the components are properly connected and the system is safe to operate.
Example 12V Solar Panel Wiring Diagram
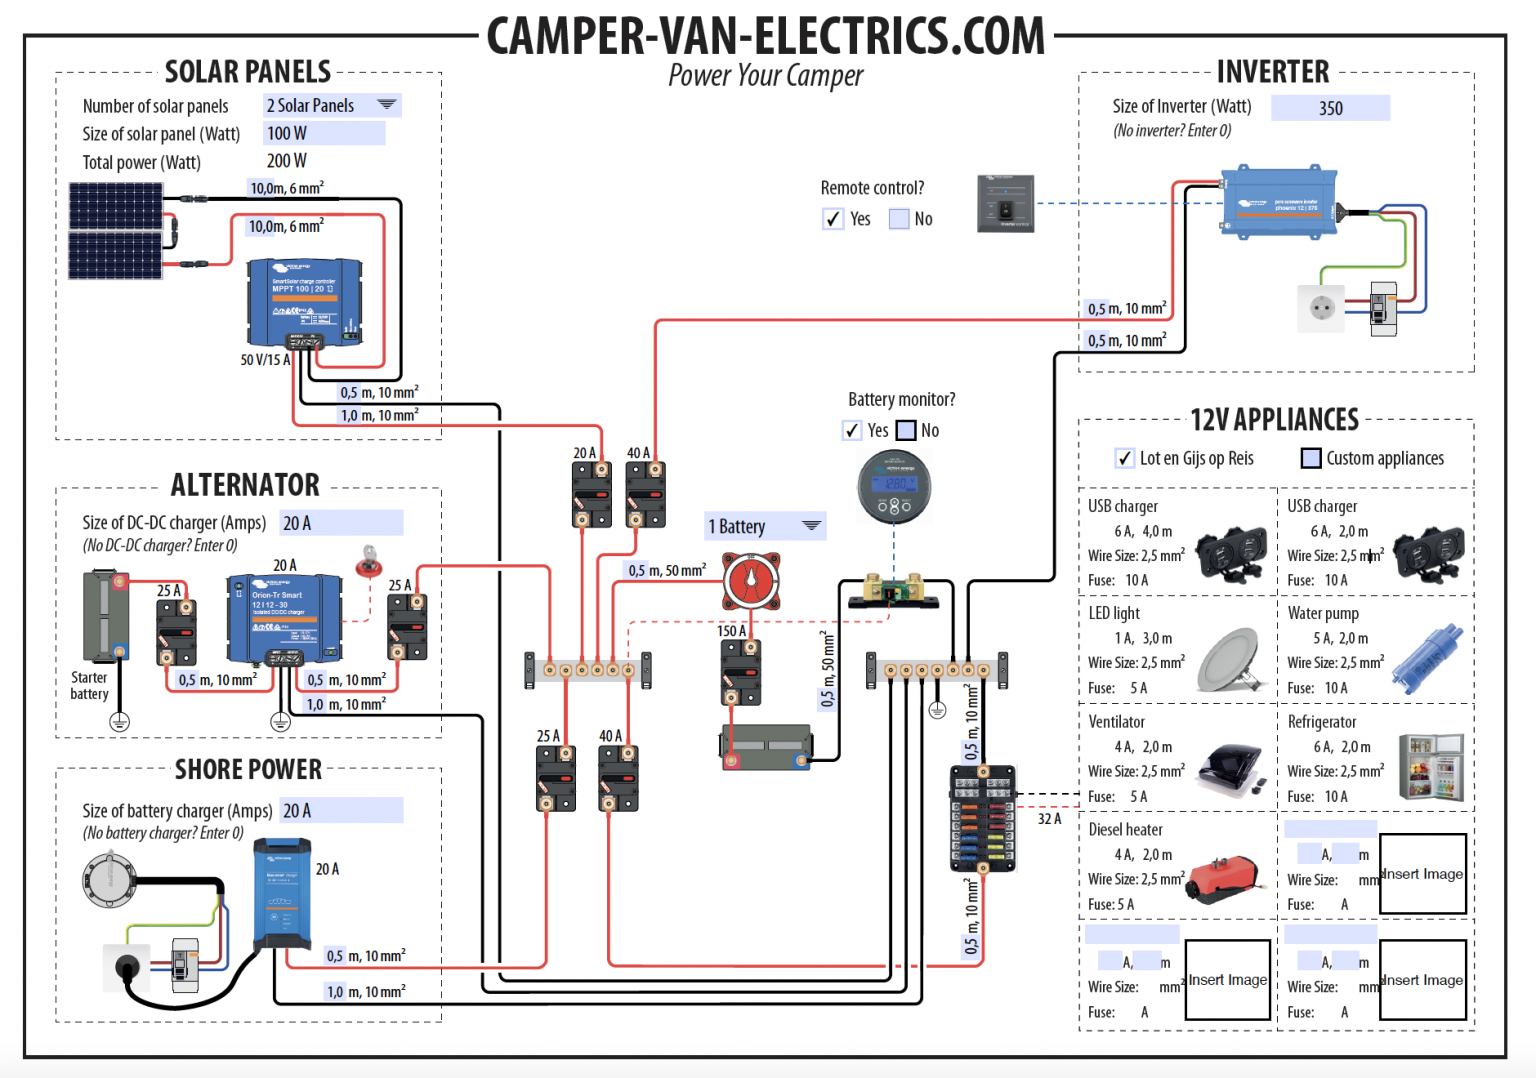
Here is an example of a 12V solar panel wiring diagram for a camper van:
- Solar Panel Array: 2 x 100W solar panels connected in parallel
- Charge Controller: 30A MPPT charge controller
- Battery Bank: 2 x 120Ah deep cycle batteries connected in parallel
- Inverter: 2000W pure sine wave inverter
- Fuses and Circuit Breakers: 30A fuse between the solar panel array and charge controller, 50A circuit breaker between the battery bank and inverter
- Wiring and Connectors: 10AWG wiring between the solar panel array and charge controller, 8AWG wiring between the battery bank and inverter
Safety Considerations
When designing and installing a 12V solar panel system, safety is paramount. Ensure that:
- Proper Wiring and Connectors: Use proper wiring and connectors to connect the components, taking into account factors such as voltage, current, and environmental conditions.
- Fuses and Circuit Breakers: Use fuses and circuit breakers to protect the system from overcurrent and short circuits.
- Grounding: Ensure that the system is properly grounded, preventing electrical shock and damage.
- Ventilation: Ensure that the system has proper ventilation, preventing overheating and damage.
Conclusion
A well-designed 12V solar panel wiring diagram is essential for a safe and efficient solar panel system in a camper van. By understanding the components and design considerations, you can create a reliable and efficient system that meets your power requirements. Always follow safety guidelines and regulations, ensuring that the system is safe to operate and maintain. With this comprehensive guide, you are now ready to design and install a 12V solar panel system for your camper van, harnessing the power of the sun to explore the great outdoors.