“Solar battery bank wiring diagram”
Introduction to Solar Battery Bank Wiring Diagrams
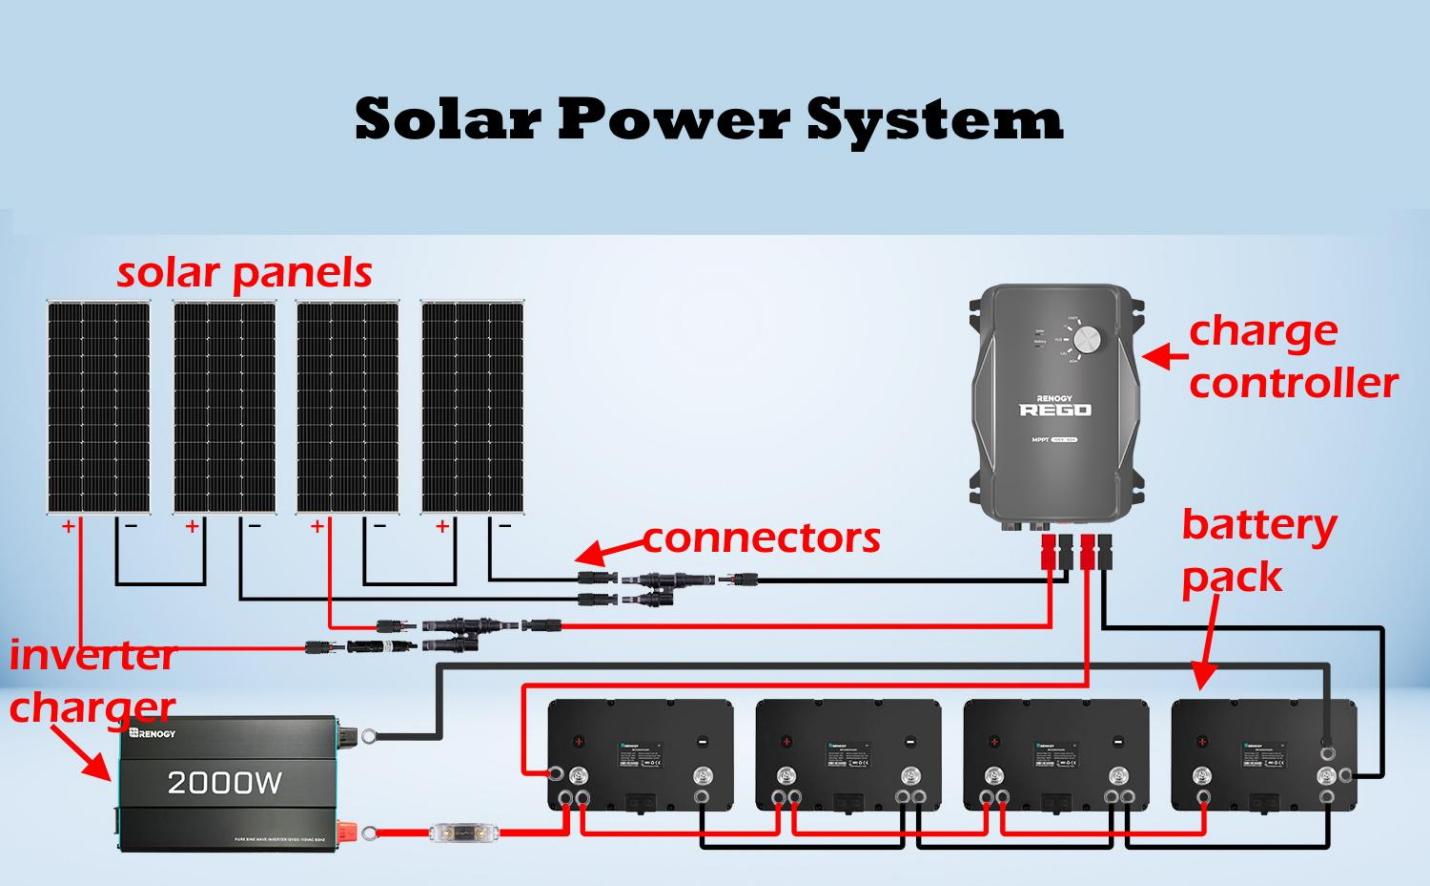
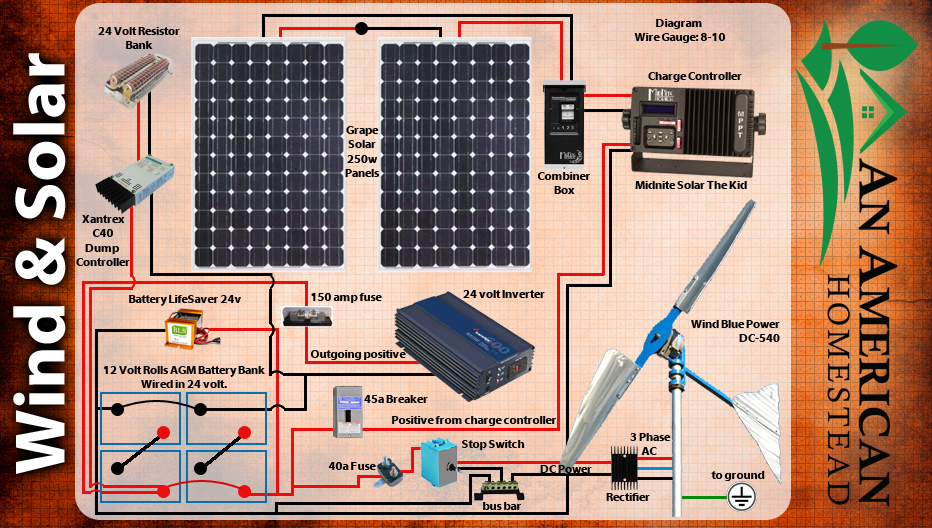
A solar battery bank wiring diagram is a visual representation of the electrical connections between the solar panels, charge controller, battery bank, and inverter/charger. The diagram shows how the components are connected, including the wiring, fuses, and circuit breakers. A well-designed wiring diagram is essential to ensure safe and efficient operation of the solar power system.
Importance of Proper Wiring
Proper wiring is crucial to prevent electrical shocks, fires, and damage to the solar power system. Improper wiring can lead to:
- Electrical shocks: Incorrect wiring can cause electrical shocks, which can be fatal.
- Fires: Poor wiring can lead to overheating, sparking, and fires.
- System damage: Incorrect wiring can damage the solar panels, charge controller, battery bank, and inverter/charger.
- Reduced system efficiency: Poor wiring can reduce the overall efficiency of the solar power system, leading to decreased energy production and increased energy costs.
Types of Solar Battery Bank Wiring Diagrams
There are several types of solar battery bank wiring diagrams, including:
- Series wiring diagram: In a series wiring diagram, the solar panels are connected in series, with each panel connected to the next one in a chain-like fashion.
- Parallel wiring diagram: In a parallel wiring diagram, the solar panels are connected in parallel, with each panel connected to the same electrical busbar.
- Series-parallel wiring diagram: In a series-parallel wiring diagram, the solar panels are connected in a combination of series and parallel configurations.
- Split-phase wiring diagram: In a split-phase wiring diagram, the solar panels are connected to two separate electrical buses, one for each phase.
Components of a Solar Battery Bank Wiring Diagram
A solar battery bank wiring diagram typically includes the following components:
- Solar panels: The solar panels are the primary source of energy for the solar power system.
- Charge controller: The charge controller regulates the flow of energy from the solar panels to the battery bank.
- Battery bank: The battery bank stores excess energy generated by the solar panels during the day for use at night or during periods of low sunlight.
- Inverter/charger: The inverter/charger converts DC power from the battery bank to AC power for use in the home or business.
- Fuses and circuit breakers: Fuses and circuit breakers protect the solar power system from electrical surges and overloads.
- Wiring and connectors: The wiring and connectors connect the components of the solar power system, including the solar panels, charge controller, battery bank, and inverter/charger.
Step-by-Step Guide to Creating a Solar Battery Bank Wiring Diagram
Creating a solar battery bank wiring diagram can be a complex process, but with the right tools and knowledge, it can be done safely and efficiently. Here is a step-by-step guide to creating a solar battery bank wiring diagram:
- Determine the system size: Determine the size of the solar power system, including the number of solar panels, battery bank capacity, and inverter/charger rating.
- Choose the wiring configuration: Choose the wiring configuration, including series, parallel, or series-parallel.
- Select the components: Select the components, including solar panels, charge controller, battery bank, inverter/charger, fuses, and circuit breakers.
- Create a wiring diagram: Create a wiring diagram, using a software program or drawing tool, to illustrate the connections between the components.
- Include safety features: Include safety features, such as fuses and circuit breakers, to protect the solar power system from electrical surges and overloads.
- Test and verify: Test and verify the wiring diagram to ensure that it is accurate and complete.
Best Practices for Creating a Solar Battery Bank Wiring Diagram
When creating a solar battery bank wiring diagram, it is essential to follow best practices to ensure safety and efficiency. Here are some best practices to keep in mind:
- Use a standard wiring diagram symbol: Use a standard wiring diagram symbol to represent each component, including solar panels, charge controller, battery bank, and inverter/charger.
- Label each component: Label each component, including the solar panels, charge controller, battery bank, and inverter/charger, to ensure that they can be easily identified.
- Include a key or legend: Include a key or legend to explain the symbols and abbreviations used in the wiring diagram.
- Use a consistent wiring color code: Use a consistent wiring color code to identify the different types of wires, including positive, negative, and ground.
- Include safety features: Include safety features, such as fuses and circuit breakers, to protect the solar power system from electrical surges and overloads.
Conclusion
Creating a solar battery bank wiring diagram is a critical step in designing and installing a solar power system. By following the steps outlined in this article, you can create a wiring diagram that is safe, efficient, and easy to understand. Remember to use standard wiring diagram symbols, label each component, and include safety features to protect the solar power system from electrical surges and overloads. With a well-designed wiring diagram, you can ensure that your solar power system operates safely and efficiently, providing you with clean and renewable energy for years to come.