One of the key components in a solar panel system is the Maximum Power Point Tracking (MPPT) charge controller, which plays a crucial role in optimizing energy production and storage. In this article, we will delve into the world of solar panel MPPT charge controller wiring for boats, exploring the fundamental principles, best practices, and safety considerations.

Introduction to MPPT Charge Controllers
Before diving into the wiring aspects, it's essential to understand the role of an MPPT charge controller in a solar panel system. The primary function of an MPPT charge controller is to regulate the flow of energy from the solar panels to the battery bank, ensuring that the maximum amount of power is extracted from the solar panels and stored in the batteries. MPPT charge controllers achieve this by continuously monitoring the voltage and current output of the solar panels and adjusting the charging parameters to maximize energy production.
Wiring Considerations for Boat Solar Panel Systems
When it comes to wiring a solar panel system on a boat, it's crucial to consider the unique challenges and requirements of a marine environment. Boat solar panel systems are exposed to harsh conditions, including saltwater, high temperatures, and humidity, which can pose significant risks to the electrical components. To ensure reliable and safe operation, it's essential to follow best practices for wiring and installation.
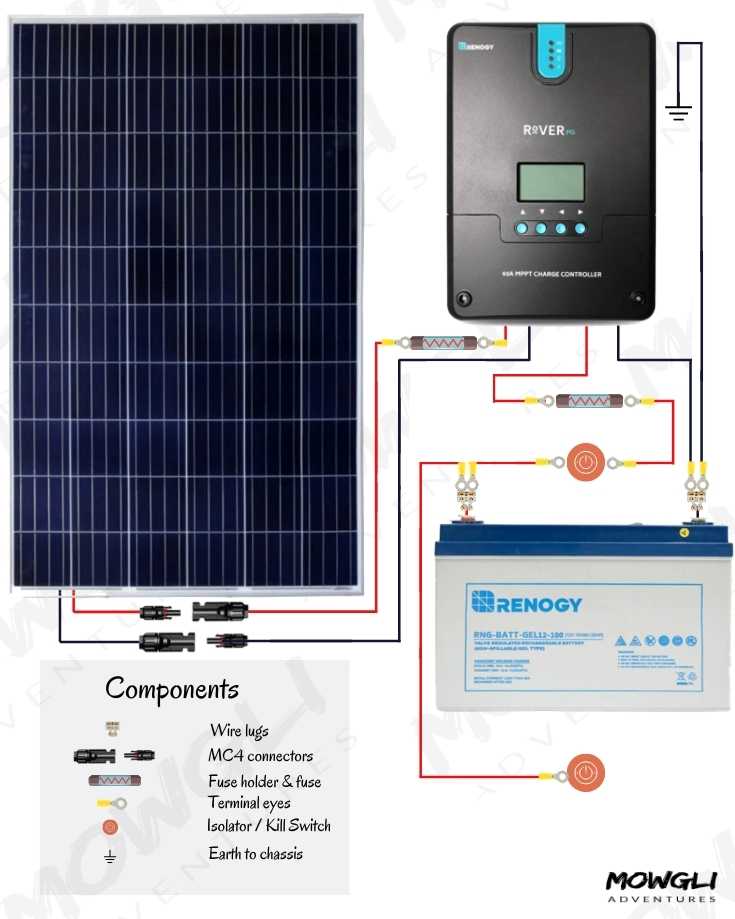
Key Components of a Boat Solar Panel System
A typical boat solar panel system consists of the following components:
- Solar Panels: These convert sunlight into electrical energy.
- MPPT Charge Controller: Regulates the flow of energy from the solar panels to the battery bank.
- Battery Bank: Stores excess energy generated by the solar panels for later use.
- Inverter/Charger: Converts DC power from the battery bank to AC power for appliances and charging devices.
- Load Center: Distributes power from the inverter/charger to various appliances and devices on the boat.
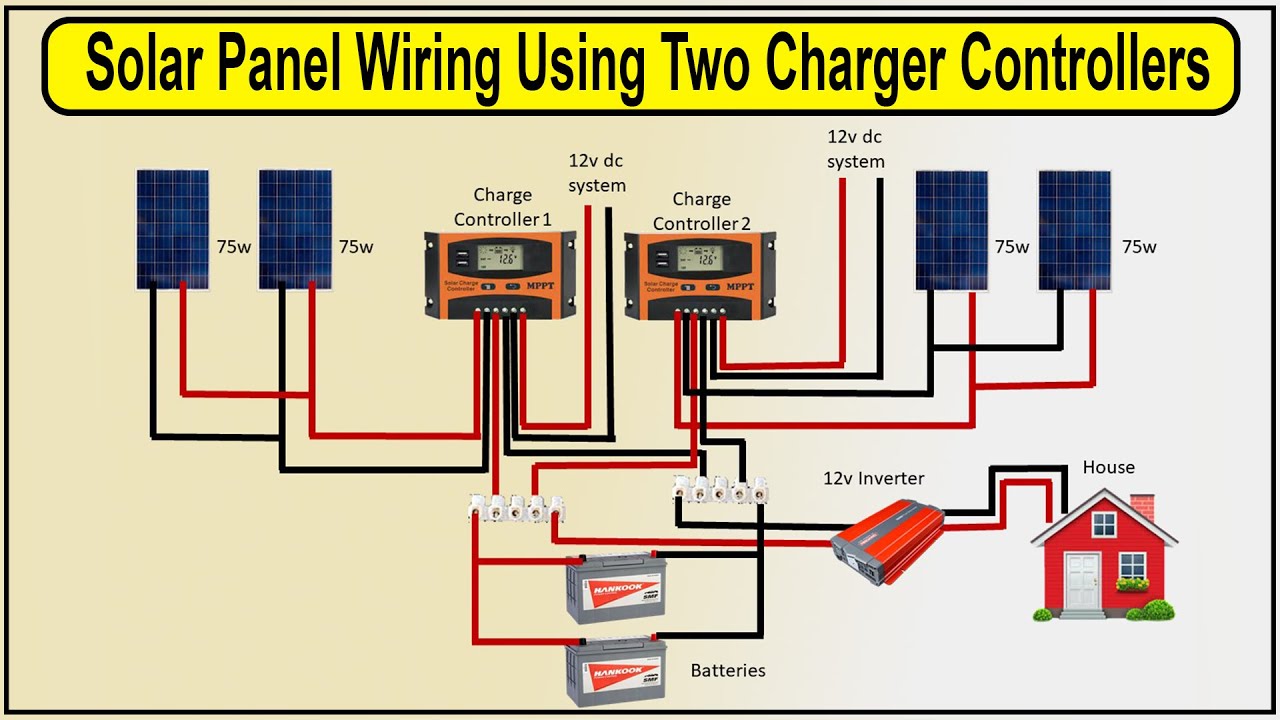
Wiring Diagram for a Basic Boat Solar Panel System
Here is a simplified wiring diagram for a basic boat solar panel system:
- Solar Panels (in series or parallel) → MPPT Charge Controller → Battery Bank
- Battery Bank → Inverter/Charger → Load Center
- Load Center → Appliances and Devices (e.g., lights, refrigerator, navigation equipment)

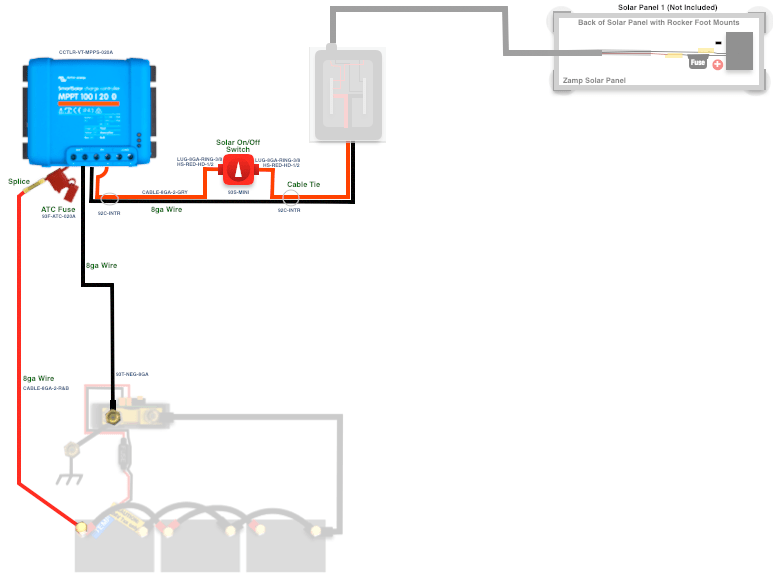
Best Practices for Wiring a Boat Solar Panel System
To ensure safe and reliable operation, follow these best practices for wiring a boat solar panel system:
- Use Marine-Grade Cables and Connectors: Choose cables and connectors specifically designed for marine environments, which are resistant to saltwater, UV radiation, and extreme temperatures.
- Keep Wiring Runs Short and Organized: Minimize wiring runs to reduce voltage drop and electromagnetic interference (EMI).
- Use Proper Wire Sizing: Select wires with adequate gauge and insulation to handle the maximum expected current.
- Implement Overcurrent Protection: Install fuses or circuit breakers to protect against overcurrent conditions, such as short circuits or overload.
- Grounding and Bonding: Ensure proper grounding and bonding of all electrical components, including the solar panels, MPPT charge controller, and battery bank.
Safety Considerations
When working with electrical systems on a boat, safety should always be the top priority. Be aware of the following hazards and take necessary precautions:
- Electrical Shock: Avoid contact with live electrical components, and ensure all wires are properly insulated and secured.
- Fire Risk: Keep wiring and electrical components away from flammable materials, and ensure proper ventilation to prevent overheating.
- Overcurrent Protection: Install overcurrent protection devices (e.g., fuses, circuit breakers) to prevent damage from overcurrent conditions.
MPPT Charge Controller Settings and Configuration
Once the wiring is complete, it's essential to configure the MPPT charge controller settings to optimize energy production and storage. The following parameters should be set:
- Maximum Power Point Tracking (MPPT) Settings: Configure the MPPT settings to match the solar panel array's voltage and current characteristics.
- Battery Type and Settings: Select the correct battery type (e.g., lead-acid, lithium-ion) and configure the charge settings accordingly.
- Charge Controller Monitoring: Set up monitoring parameters, such as voltage, current, and temperature, to track the system's performance and detect potential issues.
Conclusion
In conclusion, wiring a solar panel MPPT charge controller system for a boat requires careful consideration of the unique challenges and requirements of a marine environment. By following best practices for wiring, safety, and configuration, you can ensure a reliable and efficient solar panel system that meets your energy needs while minimizing risks. Remember to always consult the manufacturer's instructions and seek professional assistance if you're unsure about any aspect of the installation process.
Additional Resources
For further information and guidance, consult the following resources:
- National Electric Code (NEC): A comprehensive guide to electrical wiring and safety standards.
- American Boat and Yacht Council (ABYC): A leading authority on marine electrical systems and safety.
- Manufacturer's Instructions: Consult the manufacturer's documentation for specific guidance on MPPT charge controller settings and configuration.
By investing time and effort into designing and installing a well-planned solar panel system, you can enjoy the benefits of renewable energy and reduce your reliance on traditional fossil fuels. Happy sailing!