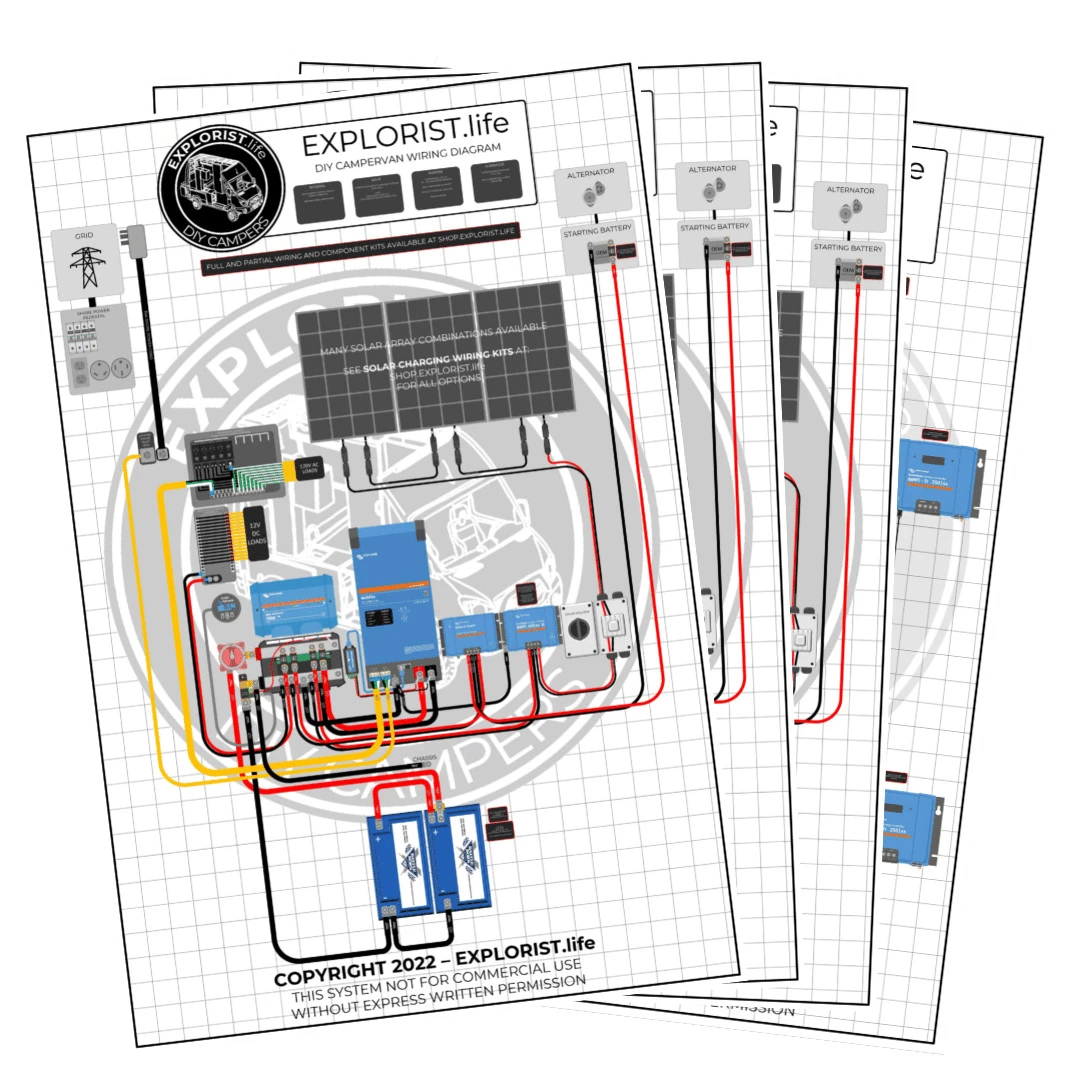
“Simple solar panel wiring diagram for beginners”
Introduction to Solar Panel Systems
A solar panel system consists of several components, including:
- Solar Panels: These are the photovoltaic (PV) panels that convert sunlight into electrical energy.
- Charge Controller: This device regulates the flow of energy from the solar panels to the battery, ensuring that the battery is not overcharged or damaged.
- Battery: This stores the excess energy generated by the solar panels for use during the night or on cloudy days.
- Inverter: This device converts the DC (direct current) energy from the battery into AC (alternating current) energy, which is usable by household appliances.
- Load: This refers to the appliances and devices that use the energy generated by the solar panel system.
Simple Solar Panel Wiring Diagram

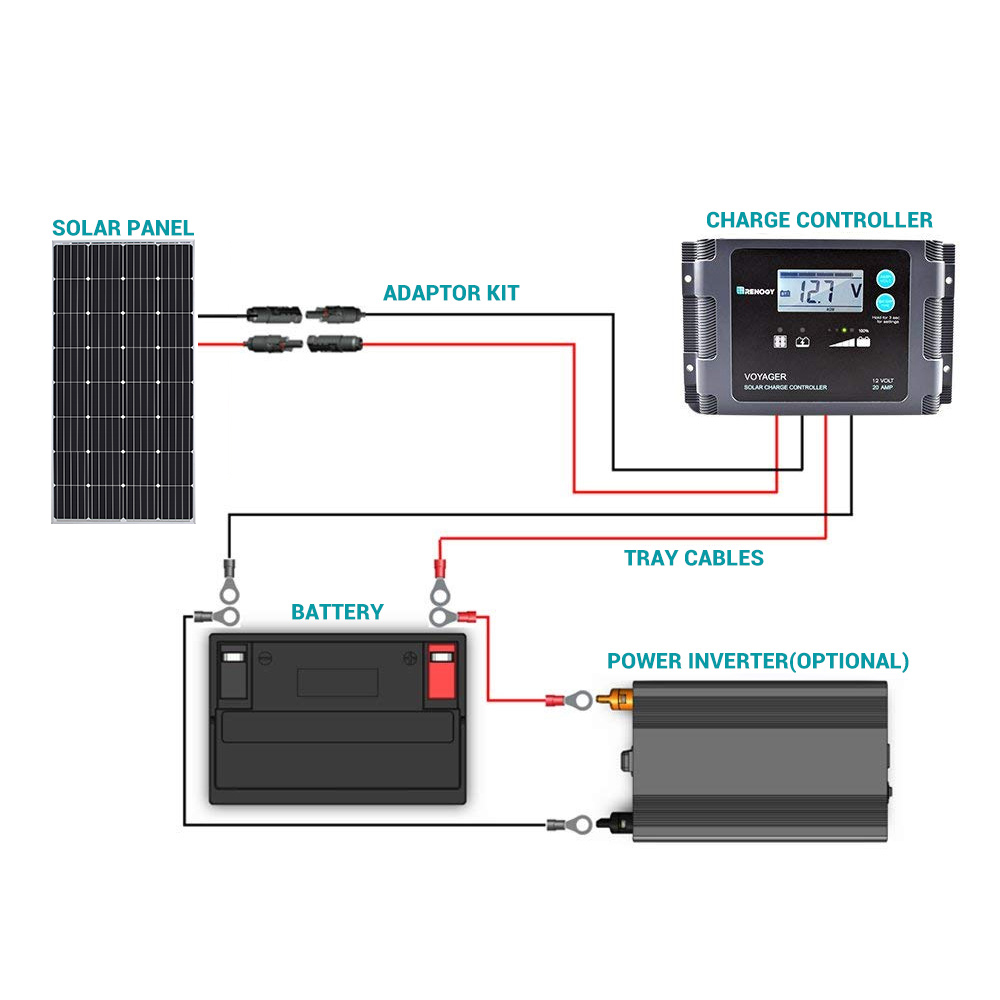
The wiring diagram of a simple solar panel system is relatively straightforward. Here is a basic diagram:
+---------------+ | Solar Panel | +---------------+ | | v +---------------+ | Charge Controller | +---------------+
 | | v +---------------+ | Battery | +---------------+ | | v +---------------+ | Inverter | +---------------+ | | v +---------------+ | Load | +---------------+
In this diagram, the solar panel is connected to the charge controller, which is then connected to the battery. The battery is connected to the inverter, which is finally connected to the load (appliances and devices).
Wiring the Solar Panel
To wire the solar panel, follow these steps:
- Connect the positive terminal of the solar panel to the positive terminal of the charge controller. This is usually marked with a "+" sign or a red wire.
- Connect the negative terminal of the solar panel to the negative terminal of the charge controller. This is usually marked with a "-" sign or a black wire.
- Ensure that the connections are secure and not loose. Use wire nuts or connectors to secure the wires.
Wiring the Charge Controller
To wire the charge controller, follow these steps:
- Connect the positive terminal of the charge controller to the positive terminal of the battery. This is usually marked with a "+" sign or a red wire.
- Connect the negative terminal of the charge controller to the negative terminal of the battery. This is usually marked with a "-" sign or a black wire.
- Connect the load terminals of the charge controller to the inverter. The load terminals are usually marked with a "LOAD" or "OUT" label.
Wiring the Battery
To wire the battery, follow these steps:
- Connect the positive terminal of the battery to the positive terminal of the inverter. This is usually marked with a "+" sign or a red wire.
- Connect the negative terminal of the battery to the negative terminal of the inverter. This is usually marked with a "-" sign or a black wire.
- Ensure that the connections are secure and not loose. Use wire nuts or connectors to secure the wires.
Wiring the Inverter
To wire the inverter, follow these steps:
- Connect the positive terminal of the inverter to the positive terminal of the load. This is usually marked with a "+" sign or a red wire.
- Connect the negative terminal of the inverter to the negative terminal of the load. This is usually marked with a "-" sign or a black wire.
- Ensure that the connections are secure and not loose. Use wire nuts or connectors to secure the wires.
Safety Precautions
When working with electrical systems, it is essential to take safety precautions to avoid injury or damage. Here are some tips:
- Use protective gear: Wear gloves, safety glasses, and a face mask when working with electrical systems.
- Ensure proper ventilation: Work in a well-ventilated area to avoid inhaling fumes or particles.
- Use proper tools: Use the correct tools for the job, such as wire strippers and pliers.
- Disconnect the system: Disconnect the system from the grid or load before making any connections or repairs.
Tips for Beginners
If you are new to solar panel wiring, here are some tips to keep in mind:
- Start with a simple system: Begin with a small solar panel system and gradually expand as you gain experience.
- Read the manual: Read the manual or instructions provided with the equipment to ensure that you understand the wiring diagram and connections.
- Use a wiring diagram: Use a wiring diagram to help you visualize the connections and ensure that you are making the correct connections.
- Seek professional help: If you are unsure or uncomfortable with any aspect of the wiring process, seek professional help from a licensed electrician or solar panel installer.
Conclusion
In conclusion, a simple solar panel wiring diagram is relatively straightforward and easy to understand. By following the steps outlined in this article, you can create a basic solar panel system that meets your energy needs. Remember to take safety precautions and use proper tools and techniques when working with electrical systems. With practice and experience, you can expand your solar panel system and reduce your reliance on the grid. Whether you are a homeowner or a business owner, solar panels are a great way to reduce your carbon footprint and save money on energy costs. So why wait? Start your solar panel journey today!


